

1. Open the SQL Server Client Network Utility: Start > Programs > Microsoft SQL Server > Client Network Utility.
2. Click on the “Alias” tab.
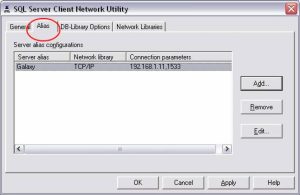
3. Click “Add” and enter the following information:
Server Alias – Galaxy (Your SQL Server Hostname)
Network Library – TCP/IP
Computer Name – 192.168.1.11 (Your SQL server IP, see Notes below)
Port Number – 1533
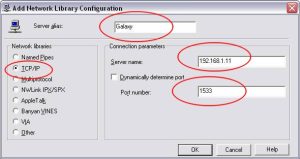
4. Click OK.
5. Click OK – This will close out the Client Network Utility.
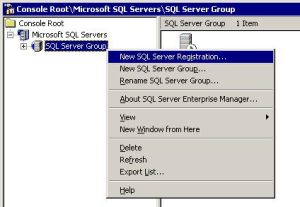
6. Open Enterprise Manager. Right Click “Microsoft SQL Servers” and select “New SQL Server Registration” This will open a wizard. Click Next.

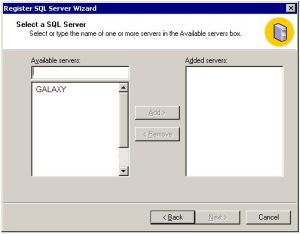
7. Select “Galaxy” (SQL Server Hostname) from the list of available servers and “Add” it. Click Next.
8. Choose to connect using SQL Server Authentication.
9. Enter your assigned username and password. Keep on clicking next until the wizard is completed.
Notes :
– You may obtain your SQL server IP after you have created your MSSQL database inside your HELM/DNP control panel.
– Please make sure you have SQL Service Pack 3 installed on your terminal.
– Please make sure your local firewall is not blocking Port 1533
– This article only applicable to Windows 2003 hosting packages with MSSQL database support.