
1. Login to WHM.
P/s: You may ignore the SSL warning if you don’t own a valid SSL.

2. Click ‘I Agree/Go to Step 2’.

3. Insert your valid ‘Server Contact Email Address’, ‘This Server’s Hostname’.
The Primary Resolver set as 208.67.222.222 and Secondary Resolver as 208.67.220.220. Click ‘Save & Go to Step 3’. ![]()
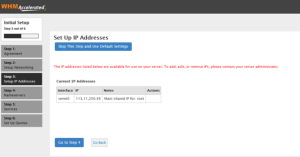
4. Click ‘Go to Step 4’.
5. Select BIND name server, insert the nameservers and its corresponding A record as per sceenshot. Then insert your server IP in ‘IP for Entry’.
======================
Nameserver1 : ns184.mschosting.com
Nameserver2 : ns185.mschosting.com
Nameserver3 : ns186.mschosting.com
======================
ns184.mschosting.com 103.18.244.52
ns185.mschosting.com 103.7.8.73
ns186.mschosting.com 173.248.178.38
======================
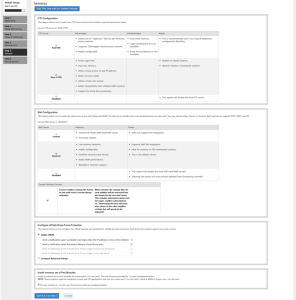
6. Select ‘Pro-FTPD in FTP configuration, ‘Dovecot’ in Mail configuration. Tick the checkbox ‘Convert Mailbox Formail’, ‘Enable cPHulk’, and Install common set of Perl Modules. ![]()
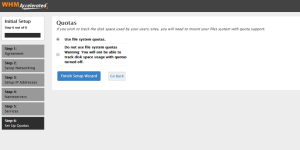
7. Select ‘Use file system quotas’, then click ‘Finish Setup Wizard’.